Giáo trình học DaVinci Resolve 12 đầy đủ chi tiết nhất
Oh, hôm nay dohoafx.com sẽ giới thiệu đến anh chị em yêu thích dựng phim và chỉnh màu cho phim ảnh một giáo trình rất chi tiết về phần mềm DaVinci Resolve 12 mới nhất . DaVinci Resolve đang là một phần mềm đình đám trong việc xử lý màu sắc cho video rất chuyên nghiệp , để giúp bạn làm chủ nó , dohoafx đã đăng tải một bộ giáo trình trọn vẹn được hứa hẹn là giúp bạn nắm chắc và xuất bản thành công videoclip của mình
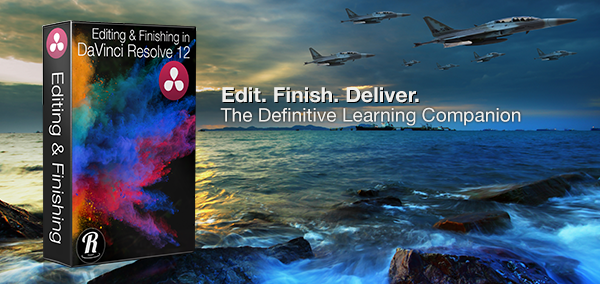
DaVinci Resolve 12 cung cấp đến cho bạn rất nhiều tiện ích trong chỉnh màu dựng phim , vì thế thao tác của nó cũng rất nhiều, giáo trình của dohoafx chia sẻ bao gồm 90 phần bài học chi tiết, ghi chú theo từng phần trong list video . Bộ giáo trình tiếng anh phát online tại dohoafx giúp bạn có thể xem bất cứ lúc nào , ở đâu . Có tiếng anh là một lợi thế khi xem bộ tài liệu này 🙂
Danh sách 90 video bạn học gôm có
1. Introduction
- Resolve vs. Resolve Studio
- Working in the Project Manager
- Setting up a Multi-User Login
- Accessing the Database Manager
- Understanding Database Types
- Switching Between Databases
2. Choosing Preferences
- Choosing a Scratch Disk
- System Preferences
- Video I/O and GPU Settings
- Audio Preferences
- Control Panels
3. The Project Manager
- Exploring the Project Manager UI
- Adding Projects to Folders
- How Projects are Organized
- Moving Projects via Copy/Paste
- Changing the Project Manager Appearance
- Searching for Projects
- Copying Projects Between Databases
4. Relinking Media
- Importing a DRP File
- Selecting Items for Relinking
- Relinking Project Media
- Saving the Project
- Renaming a Project
- Archiving a Project
5. Setting up a Project
- Accessing Project Settings
- The Master Project Settings
- Choosing a Timeline Resolution
- Pixel Aspect Ratio
- Timeline Frame Rate
- Video Monitoring
- Conform Options
- Working with Mixed Frame Rates
- Image Processing
- Working with Interlaced Footage
- Choosing Video I/O Options
- Video Bit Depth – Performance over Quality
- EDL & Media Composer Conform Options
- Image Scaling
- Output Scaling
6. Project Organization
- Use Timelines Bin
- Use Smart Bin for Timelines
- Creating Sub Bins in the Timelines Bin
7. Keyboard Mapping
- Keyboard Sets
- Modifying a Shortcut
- Saving a Mapping Preset
- Auto Save Options
8. Importing from Other NLEs
- Load XML Options
9. Touring the Resolve UI
- Choosing a Workspace
- Choosing a Layout
- Resetting the Layout
- Resizing UI Panels
- The UI Toolbar
- The Media Pool
- Importing via Drag and Drop
- The Viewer
- Audio Meters
- The Metadata Editor
- Creating Custom Metadata Sets
10. Exploring the Edit Page
- The Media Pool
- The Source Viewer
- The Timeline Viewer
11. Quick Tour of the Timeline
12. Quick Tour of the Color & Deliver Pages
- Resolve’s 4 Part Workflow
13. Importing Media
- Opening Project Zero
- Locating Media in the Media Storage Browser
- Viewing Folder Hierarchies
- Previewing Clips in the Viewer
- Revealing Duration & Timecode
- Media Import Options
- Importing Into Media Pool Bins
- Drag & Drop Importing
- Adding a Favorite
- Drag & Drop from the Desktop
14. Cloning Media for Backups
- Adding a Job
- Set as Clone Source Option
15. Importing Individual Frames
16. Organizing the Media Pool
- Creating Bins
- Adding Clips to a Bin
- Adding a Sub-Bin
- Using Smart Bins
- Color Coding Bins
- Filter by Color Tag
- Organizing Bin Content
- Customizing the Metadata Column View
- Sorting Column Metadata
- Media Pool Searching
17. Clip Metadata
- Viewing Clip Metadata
- Editing Metadata
- Approaches to Adding Metadata
- Using Keywords
18. Editing Clip Attributes
- Video Attributes
- Audio Attributes
- Timecode Attributes
- Name Attributes
19. Syncing Audio
- Auto Syncing by Waveform
- Verifying Audio Sync
- Manually Syncing Clips
- Track Remapping
20. Working with RAW Media
21. Working with Log Encoded Media
- Resolve Color Management
- Input to Timeline Color Space Conversion
- Applying a Color Space
- Bypassing a Chosen Color Space
22. Best Light Grades for Editing
- Using Remote Grades
- The Benefits of Using Remote Grades
- Copying Remote Grades
- Sharing Remote Grades Between Timelines
23. Improving Performance
- Optimizing Media for Playback
- Using Smart Bins to Collate RAW Clips
- Generating Optimized Media
- Identifying Optimized Clips
- Choosing the Optimized Media Format
- When to Use a Float Format
- Choosing a Resolution
- Switching Between Optimized & Original Media
- Deleting Optimized Media
- Reducing Playback Resolution
- Using Smart Cache
24. Clip Logging and Prep
- Adding a Display Name
- Using Metadata for Display Names
- Copy & Pasting Metadata Variables
25. Marking Clips
- Marking In and Out Points
- Adding a Marker
- Navigating to Markers
- Creating a Subclip
26. Advanced Media Management
- Copying Media
- Moving Media
- Transcoding Media
- Media Managing Clips
27. Source & Timeline Viewers
- Opening the Project
- Resetting the Workspace
- Changing the Viewer Mode
- The Transport Controls
- JKL Transport Controls
- Looping Playback
- Zooming the Viewer
- Marking In and Out Points
- Show All Video Frames
- The Timeline Viewer
- Switching Timelines
- Scrubbing the Timeline
- Transform & Crop
28. The Timeline
- How Audio is Organized
- The Toolbar
- Timeline View Options
- Zooming the Timeline
29. Working with Tracks
- Destination Controls
- Disabling Tracks
- Editing Track Labels
- Locking Tracks
- Auto Select Controls
- Audio Track Controls
- The Master Track
- Rearranging Tracks
30.The Effects Library
31. The Edit Index
32. The Inspector
33. The Audio Meters
34. The Clip and Track Mixer
35. Preparing Clips for Editing
- Hover Scrubbing Clips
- Working in List View
- Viewing Clip Filmstrips
- Marking Clips in the Filmstrip
- Flagging a Clip
36. Creating a Timeline
- Create Timeline Using Selected Clips
- Creating an Empty Timeline
- Creating a Fast Stringout Timeline
- Creating Timelines from Bins
- Dynamic Project Switching
37. Drag & Drop Editing
- Clip Dragging Options
- Using the Overwrite Clip Button
- Drag & Drop Overwrite Edits
- Video Only Overwrite Edits
- Resizing the Video Track
- Creating New Tracks via Dragging
- Overriding Clip Linking
- Adding Tracks via the Track Header
38. Playhead Jumping
- Jumping the Playhead to Edit Points
- Using Auto Select to Control Playhead Jumping
39. Editing with More Precision
- Overwrite Edits
- Checking Destination Targets
- Previewing the Edit
- Changing Pre-Roll & Post-Roll
- Match on Action Edit
- 3-Point Edits
- Insert Edits
- Overwriting to Track V2
- Track Destination Shortcuts
- Moving a Clip to Another Track
40. Matching Action
41. Making a Dialogue Edit
42. Replace Edits
- Using the Timeline Viewer Overlays
43. Ripple Overwrite Edits
44. Backtimed Edits
45. Shuffle Edits
46. Other Editing Options
- Roll Edits
- Nudging Clips
- Making Clip Selections
- Blade Edits
- Through Edits
- Lift & Ripple Delete Edits
- Keyboard Editing
- How Auto Select Governs an Edit
47. Refining the Dialogue
- Creating a Split Edit in the Source Viewer
- Creating a Split Edit in the Timeline
- Shortcuts for Choosing a Trim Type
- Closing a Gap
- Performing a Video Split Edit
48. Maintaining Sync
- Disabling Clip Link
- Out of Sync Warning
- Resyncing Clips
- Creating Linked Relationships
- Linking Multiple Clips
49. Fit to Fill Edits
- Applying Optical Flow
50. Working with Markers
- Adding a Timeline Marker
- Navigating to Markers
- Adding a Clip Marker
- Ripple Timeline Markers
- Viewing Markers in the Edit Index
51. Clip Grouping Methods
- The Take Selector
- Compound Clips
- Editing the Contents of a Compound Clip
- Decomposing a Compound Clip
- Nesting Timelines
52. Multicam Editing
- Creating a Multicam Clip
- Choosing Multicam Clip Properties
- Choosing a Syncing Method
- Creating a Timeline from a Multicam Clip
- Viewing the Contents of a Multicam Clip
- Setting up for a Multicam Switch or Cut
- Controlling what Elements are Switched or Cut
- Choosing an Audio Angle for Monitoring
- Cutting Angles in the Source Viewer
- Trimming an Edit Point
- Manually Switching Angles
53. Reorganizing a Multicam Clip
- Changing Angle Priority
- Renaming Angles
54. Using the Trim Tool
- How Trimming Works in Resolve
- Rule that Governs Ripple Edits
- How Auto Select Toggles Affect Trimming
- Auto Select Shortcuts
- Trim Tool Main Functions
- Dual-Sided Ripple Trims
- Identifying Available Media (Handles)
- Slip Edits
- Slide Edits
- Roll Edits
55. Trimming in the Source Viewer
56. Keyboard Trimming
- More Ripple Editing Rules
57. Trimming with Timecode
58. Dynamic Trimming
- Dynamic Trimming Method 1
- Dynamic Trimming Method 2
- Multiple Selection Dynamic Trims
59. Trimming to the Playhead
- Trim Start/Trim End
- Extend Edits
60. Multi-Selection Trimming
- Asymmetric Trimming
- Real World Examples
61. Working with Transitions
- Locating Transitions
- Adding a Transition
- Adding Video and Audio Cross Dissolves
- Targeting Video or Audio for Transitions
- Adding Transitions with the Keyboard
- Adding Transitions to Multiple Edits
- Setting a Standard Transition
62. Modifying Transitions
- Changing Alignment
- Swapping Transitions
- Changing Transition Properties
- Changing the Transition Style
- Changing the Easing
- Creating a Custom Transition with Curves
- Shaping the Curve
63. Filter & Smart Cache
- Enabling Smart Cache
- Searching for Effects
64. Using the Smooth Cut Transitions
65. Working with Audio
- Compatible Audio Files
- Rolling the Audio
- Adding a Cross Fade
- Changing the Cross Fade Type
- Unlinking the Audio
- Adding Fades
- Disabling Audio
- Track Copy/Paste Rules
66. Using Markers for Audio Work
- Editing Music
67. Working with Audio Channels
- Adding an Audio Track
- Mono vs Stereo Track Assignments
- Displaying Individual Audio Channels
- Changing the Track Type
- Editing Independent Channels
- Changing Audio Clip Attributes
- Remapping Audio Channels
68. Setting Audio Levels
- Using Audio Overlays
- Copy and Paste Audio Attributes
- Using Audio Keyframes
69. Audio Mixing
- Audio Output Remapping
- Assigning Track Type
- Mute and Solo
- Pan Control
- Volume Reset
- The Master Channel
- Revealing Audio Track Overlays
- Benefit of Using Track Overlays
- Recording Automation
- Touch, Latch & Write Automation
- Set to Touch After Write
- Making Adjustments to Automation Keyframes
- Clip Automation
70. Audio Filters
- Applying a Filter to a Clip
- Removing Audio Filters
- Revealing the Filter Interface
- Applying a Filter to a Track
- Working with the Master Track
71. Exporting for Audio Workstations
- Exporting to ProTools
72. Working with Effects
- Adding a Fade Effect
- Adding a Letterbox Effect
- Modifying the Effect in the Color Page
73. Transform Controls
- Rotate, Anchor Point, Pitch & Yaw
- Resetting the Transform
- Keyframing an Effect
- Opening the Keyframe Editor
- Changing the Interpolation
- Flip and Flop
- Transforming in the Timeline Viewer
- Resetting Transform Parameters
74. Compositing Controls
- Choosing a Composite Mode
- Changing Opacity
75. Adding Titles
- Using Place on Top
- Editing the Title
- Adding a Background
- Copy & Paste a Title
- Animating Titles
- Smoothing the Animation
- Easing the Motion
- Pasting Title Attributes
76. Speed Effects
- Changing Clip Timing – 2 Methods
- Change Clip Speed
- Retiming a Clip
- Dragging to Change Speed
- How Audio is Handled
- Variable Speed Effects
- Adding a Speed Point
- Applying Optical Flow
- Changing the Speed of Segments
- Speed Presets
- Speed Ramp
77. Color Page Effects
- Overview of the Color Page
- Stabilizing a Shot
- Tracking an Object for Blurring
- Adding a Node
- Creating a Shape (Window)
- Creating a Custom Shape
78. Combining Takes Using Shapes
79. Keying
- The Qualifier Palette
- Using the 3D Keyer
- Enabling Highlight Control
- Viewing a High Contrast Matte
- Removing Noise
- Inverting the Matte
- Removing Spill
- Creating a Compound Clip
80. Exploring the Color Page
- Viewing Timecode
- The Gallery
- Creating a Still for Shot Comparison
- Exploring Wipe Options
- Saving Grades in the Gallery
- The Node Editor
- How Nodes Work
- The Timeline
- The Mini Timeline
- Adjustment Palettes
- The Color Wheels
- The Curves Editor
- The Keyframe Editor
- The Video Scopes
- The Toolbar
- Adding Window Burn
81. Remote vs. Local Grades
- Creating a Grade Version
- Switching Between Versions
- Remote and Local Versions
- Copy Remote Grades to Local
82. Automatic Color Adjustments
- Using Automatic Adjustment
- Previewing the Grade
- Resetting a Grade
- Using Split Screen
- Automatic Shot Matching
83. Manual Color Adjustments
- Gain Controls
- Gamma Controls
- Lift Controls
- Contrast Controls
- Finding a Representative Clip to Grade
- Reducing Gain to Retrieve Detail
- Reducing the Shadows
- Using the Offset Control
- Making Contrast Adjustments First
- Resetting the Color Wheels
- Lift, Gamma, Gain Sliders
- Curves Control
- Creating an S-Curve
- Targeted Curve Adjustments
- Benefits of Using Curves vs. Color Wheels
- Hue vs. Sat Curve
84. Copying & Matching Grades
- Saving a Still
- Matching Grades
- One Still per Scene
- Creating a Split for Shot Comparison
- Analyzing the Images in the Scopes
85. Making Secondary Adjustments
- Using a Qualifier
- Finessing the Qualifier
- Types of Qualifiers
- Isolating a Face
- Tracking a Window
86. Using 3rd Party Plugins
- Correcting Barrel Distortion
- Using the Sizing Palette
87. Removing Unwanted Camera Movement
88. Broadcast Safe Controls
89. Preparing a Project for Output
- Changing the Starting Timecode
- Starting Your Program at 1:00:00:00
- Adding Pre-Program Elements
90. Delivering Your Movie
- Render Settings
- Rendering a Single Clip
- Render Timeline as Options
- Choosing a Video Format to Render
- Choosing a Resolution
- Audio Export Options
- Choosing File Options
- Rendering Image Sequences
- Setting Additional Outputs
- Add to Render Queue
- Adding More Jobs to the Render Queue
- Updating a Job
- Starting a Render
- Power User Tip
- Wrap Up
Xem video
Chất lượng Video Full HD 1080
https://www.youtube.com/playlist?list=PLmENGkAHJ5hmm-ZPzGZxpzzvPIXw9VEXg
Nếu bạn chưa có phần mềm Davince resolve 12 , có thể download phần mềm đó tại đây
Giáo trình học DaVinci Resolve 12 đầy đủ chi tiết nhất
Cảm ơn bạn đã xem bài

![[IMG]](http://dohoafx.com/wp-content/uploads/2016/05/fYKe0rm-520x245.png)


